With the release of Jamf Pro 11.15 Jamf has been forcing customers to enable Jamf Account OIDC for authentication to use new features. In the default OIDC configuration each admin needs to be manually provisioned in Jamf Pro. As an MSP this is a difficult change to implement when you have to manage multiple consultants spread across multiple Jamf instances. There are undocumented features in Jamf Pro that allow for Just In Time login with permissions tied to a group.
It should be noted that group authorization is not possible with Google Workspaces OIDC customers. This is currently a feature request.
Updated 04/29/2025 to include group claim expression for AD groups.
Updated 04/14/2025 to include Just In Time Provisioning section and Google Workspaces support.
Jamf OIDC App in Okta
First you want to create the OIDC app in Okta, you should follow Jamf’s instructions to setup. Pay close attention to step 8 for setup here. Since OIDC claims are limited in size you should create a claim filter to limit the size. For example if all your Jamf Okta groups start with jamf- you could use the group claim filter “Starts with jamf-“

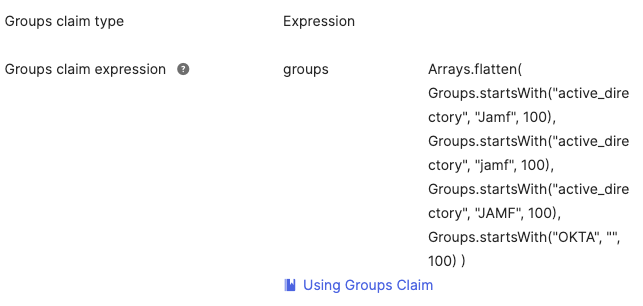
Note: If you’re using groups imported to Okta from AD or another directory then you must use Expression for the claim type, otherwise they won’t be included. See Jamf’s documentation for more details, example expression below includes AD groups that start with the word “JAMF, Jamf, jamf”. Read up on Okta Expression language to modify for your environment.
Okta SSO in Jamf Account
This is where we stray from the official Jamf documentation a bit. In the document referenced in the previous step you’ll notice a sneaky little footnote: “Note: If you want to use groups with Okta, you must select the IdP type of “Custom” when setting up SSO in Jamf Account.”
When setting up a SSO connection in account.jamf.com don’t set the Connection Type to Okta as Jamf documentation suggests, instead set it to Generic OIDC. Now enter the following values:
- Client ID: from Okta
- Client Secret: from Okta
- Issuer URL: The base name for your Okta tenant (i.e. https://company.okta.com)
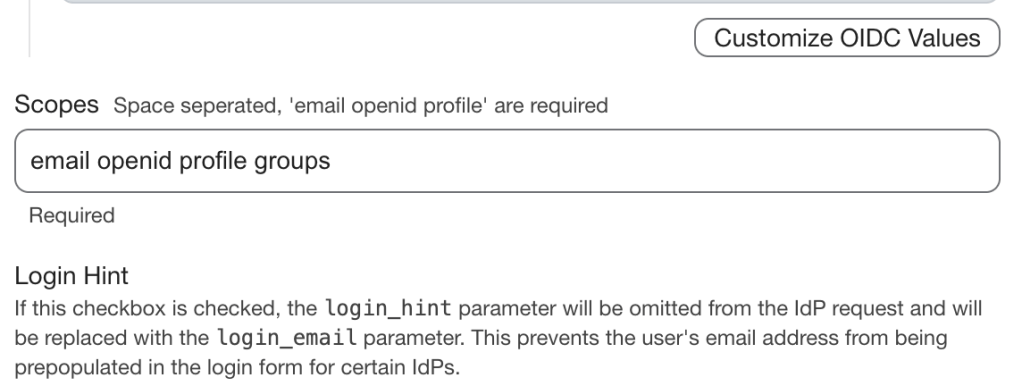
Under OIDC values there is a small link titled “Add scope (Optional)”, click on this to show the scopes. You’ll want to add groups to the scope as shown below.
Don’t forget to assign the SSO configuration to your domain and Jamf Pro instance!
Jamf Account Just-In-Time Provisioning
While Jamf Account doesn’t support SCIM, one undocumented feature is Jamf account supports Just-In-Time (JIT) provisioning for logins from OIDC. It should be noted that accounts that don’t exist will be created with Administrator Read Only access by default.
Jamf Pro Permissions Groups
We now need to create group in Jamf pro that define permission for each incoming group from Okta.
- Navigate to your Jamf Pro Server > Settings > User accounts and groups.
- Click new at the top right, then select Create Standard Group.
- Give the group a display name that exactly matches an Okta group you want to match then set privileges.
- Skip adding members.
Enable Jamf Account OIDC
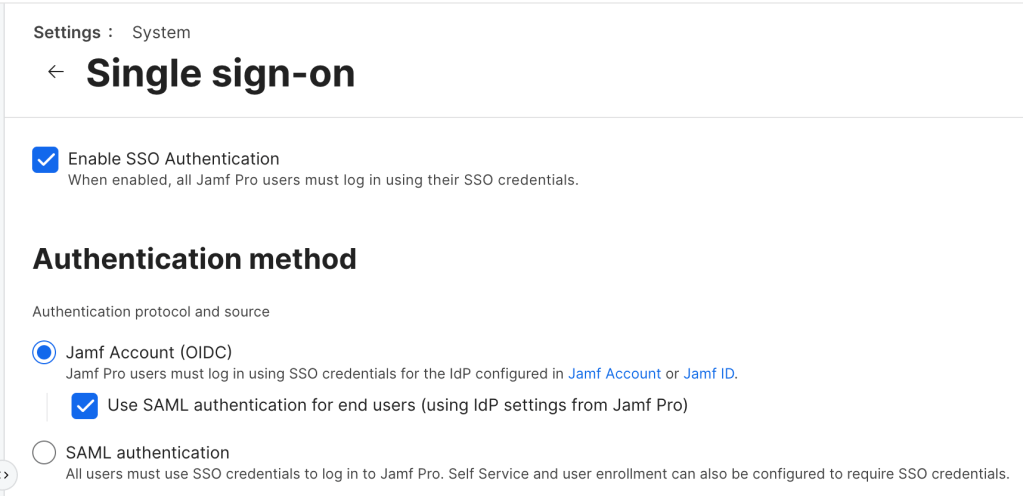
Finally enable Jamf Account OIDC in Jamf Pro Server > System > Single sign-on
Test!
Finally we’ll need to test, open up a private window and sign into your Jamf Pro instance with a user who doesn’t manually have an account set. They should login as an admin! You should now delete any local accounts you want to be automatically provisioned, make sure to leave at least one backup admin account!
